1. Getting Started
When you host multiple domain names within a single cPanel account, you have a "main domain" name and one or more "addon domain" names. In my example throughout this article, griffin.software is my main domain name and certsage.com and cloakanddagger.com are my addon domain names. You can identify your main domain name and addon domain names by scrolling to the Domains section in your cPanel and clicking on the Domains link in that section as seen in this screenshot:

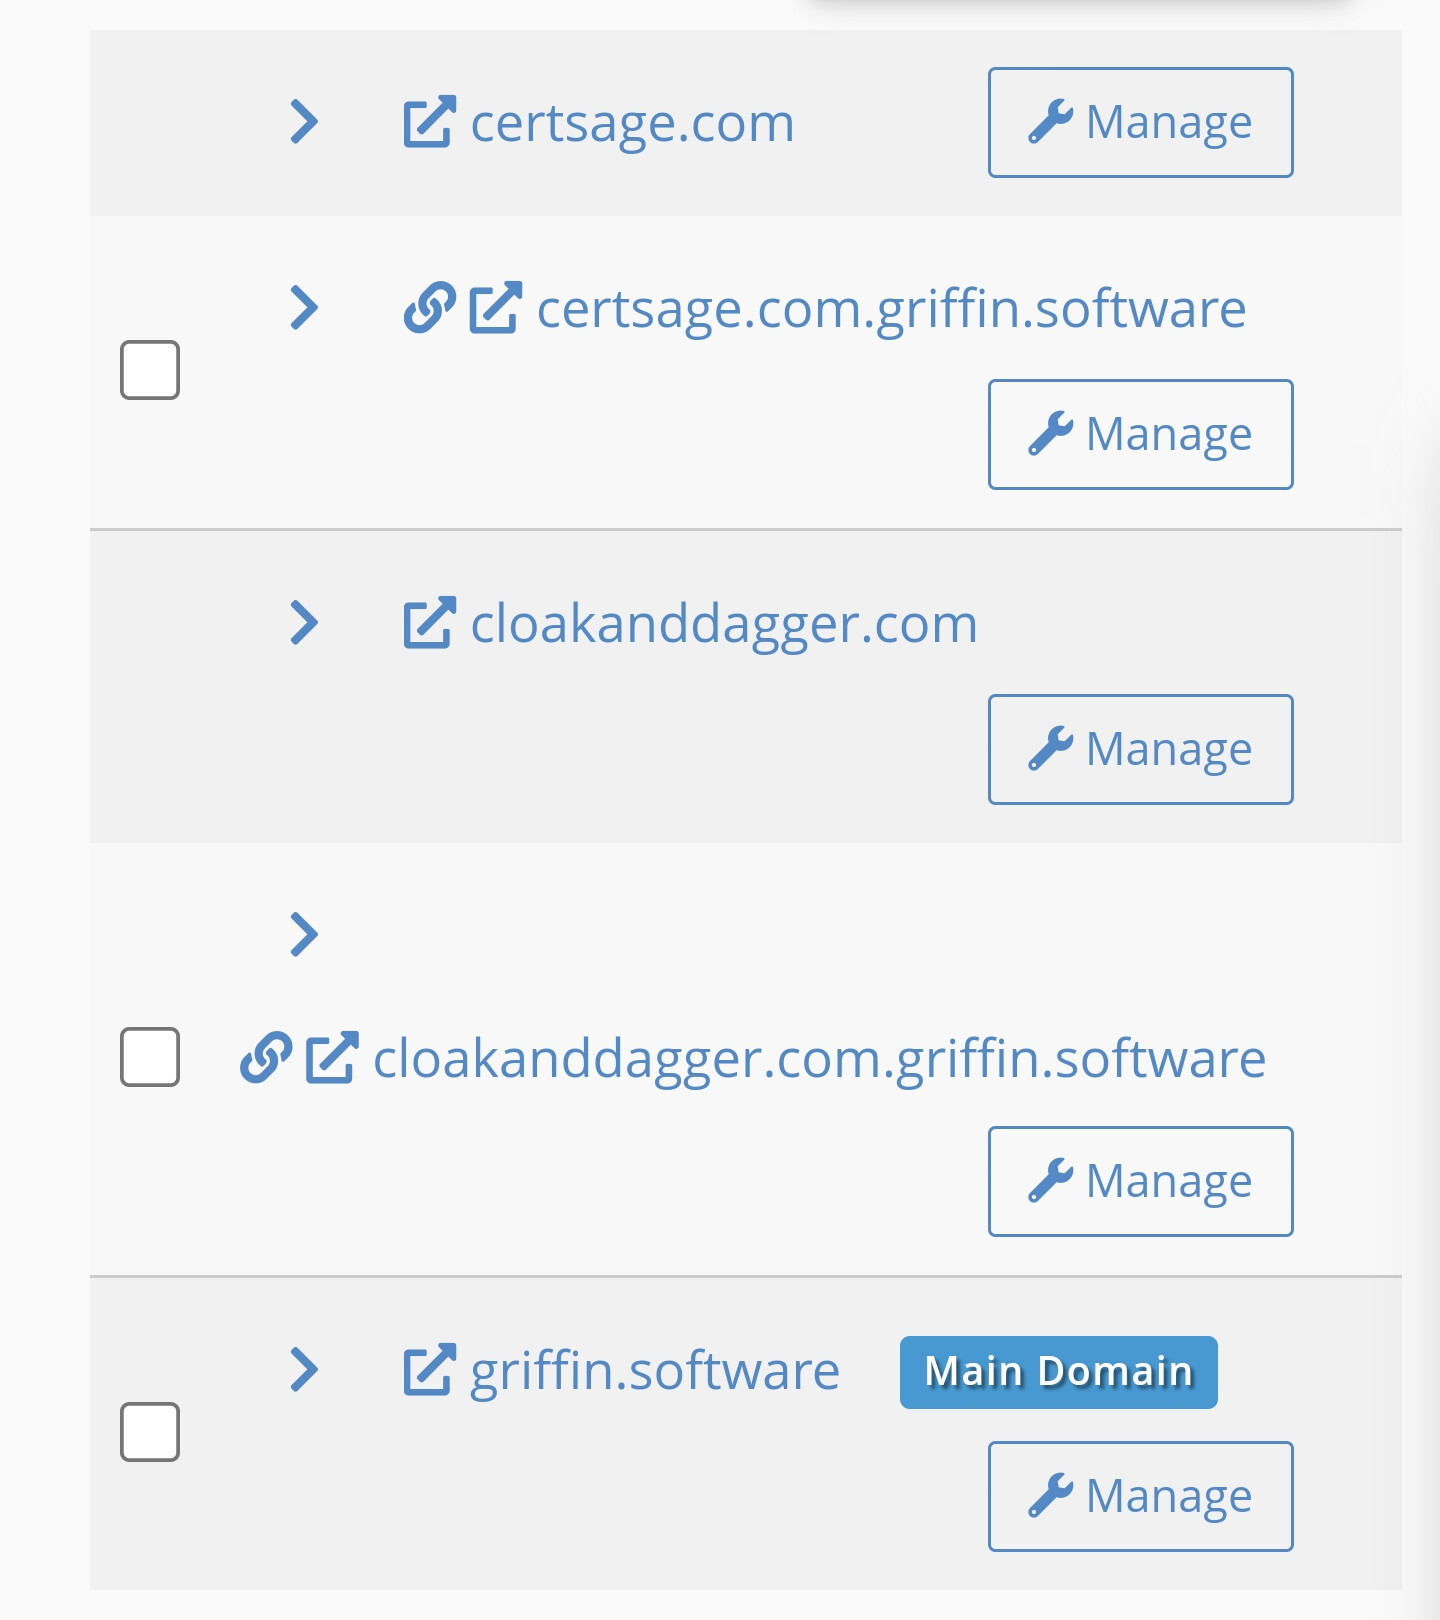
On the next screen you will see the domain names hosted in your cPanel account. As seen in the first screenshot below, griffin.software is clearly my main domain name while certsage.com and cloakanddagger.com are my addon domain names. You'll also notice in the first screenshot below that there are also two subdomain names of griffin.software listed: certsage.com.griffin.software and cloakanddagger.com.griffin.software. This is because cPanel associates each addon domain name with a subdomain name of the main domain name. Note that these associated subdomain names are arbitrary and do not need to match their associated addon domain names in any way. If you click on the Manage button next to one of the addon domain names (e.g. certsage.com in the first screenshot below) then click the "Show Additional Details" link on the resulting page in the DOMAIN INFORMATION section (e.g. the second screenshot below), you can see the associated subdomain name for your addon domain name. You can also see the document root directory for your addon domain name, which you will need to know in later steps of this tutorial. For the main domain name (e.g. griffin.software in my case), the document root directory is /public_html, but for an addon domain name the document root directory is a directory inside of /public_html.

2. Preparing CertSage for Your Addon Domain Names
For your main domain name (e.g. griffin.software in my case), you should first follow the standard CertSage instructions for installing CertSage then acquire and install a production certificate for your main domain name and any of its subdomain names except for the subdomain names associated with your addon domain names (e.g. certsage.com.griffin.software and cloakanddagger.com.griffin.software in my case). A subdomain name associated with an addon domain name can be included in the certificate for that addon domain name. Once you have a production certificate installed for your main domain name, you can proceed to preparing CertSage for your addon domain names.
To install CertSage for addon domain names, there is a bit of prep you should do to make the process smoother. You want to have a separate CertSage data directory for each of your domain names. For your main domain name, you should already have a CertSage data directory named CertSage located in the root directory of your cPanel account. You can see this by opening File Manager in your cPanel. You need to manually create CertSage data directories for your addon domain names, which can be accomplished using File Manager, as illustrated in the screenshot below. Note how the CertSage data directories in my example exist alongside the public_html directory in the root directory, NOT inside the public_html directory, which would expose their contents to the public internet. In my case I have renamed the CertSage directory associated with my main domain name (griffin.software) to CertSage.griffin.software so that I know explicitly which domain name is associated with that CertSage data directory.

Once you have created a CertSage data directory for each of your addon domain names, the next step is to copy your production and staging ACME account keys (account.key and account-staging.key) from the CertSage data directory of your main domain name to the CertSage data directories of your addon domain names, which can be accomplished using File Manager. In my case I copied those two files from CertSage.griffin.software to CertSage.certsage.com and CertSage.cloakanddagger.com per the screenshot below. If you wish to use the same CertSage password for your addon domain names that you use for your main domain name, you can copy password.txt from the CertSage data directory of your main domain name to the CertSage data directories of your addon domain names.

3. Installing CertSage for Your Addon Domain Names
Once you have CertSage data directories prepared for all of your domain names, you need to install a certsage.php file into the document root directory of each of your domain names then modify one line of each certsage.php file to point that certsage.php to the appropriate CertSage data directory. You should already have a certsage.php file installed into /public_html, which is the document root directory for your main domain name. To install a certsage.php file for each of your addon domain names, you can simply copy the certsage.php file from /public_html to the document root directory of each of your addon domain names, which are located inside of /public_html. As an example in the screenshot below, in File Manager I can select the certsage.php file located inside the /public_html directory then copy it into the certsage.com and cloakanddagger.com directories located inside the /public_html directory.

You next need to modify each certsage.php file to point it to the appropriate CertSage data directory, which can be accomplished using File Manager. To do so, simply select the certsage.php file you wish to modify then click the Edit button in the ribbon above. This will open a new screen with a file editor displaying the contents of that certsage.php file. On the line with $dataDirectory (about line 18), modify the directory path inside the double quotes so that it points to the appropriate CertSage data directory then click the Save Changes button then click the Close button, both located in the upper right. For your main domain name, the directory path will begin with ../ where .. means that the directory you specify after the / is located in the parent directory of where certsage.php is located, meaning that it is located alongside public_html, NOT inside of public_html. For an example, see the first two screenshots below. For an addon domain name, the directory path will begin with ../../ where ../..means that the directory you specify after the second / is located in the parent directory of the parent directory of where certsage.php is located, meaning that it is located alongside public_html, NOT inside of public_html. For two examples, see the last four screenshots below. The distinction between the directory paths for your main domain name and addon domain names is absolutely critical. Setting a directory path incorrectly will cause CertSage to look in the wrong place for the data it needs.


4. Acquiring and Installing Production Certificates for Your Addon Domain Names
At this point, you can operate CertSage for your addon domain names in the same way you would for your main domain name. If you wish to be very thorough about covering the most subdomain names for each domain name, you can add an A record for each desired subdomain name to the DNS zone for the corresponding domain name. These records will point to the same IP address as the domain name, making them "aliases" of each other. Adding these A records is optional and beyond the scope of explanation of this tutorial. If there is enough demand, I will write a separate tutorial explaining in detail for GoDaddy.