[Update in July 2017 from original author @ebonsi:
Make a note of it! This tutorial is now reaching its age (old) as Letsencrypt Certs renewing evolved to certbot! Certain things still useful, like Apache redirects but everything related to LE installatin needs to be updated. I will do when time sort it out!]
My first test of LetsEncrypt on my OS X Server was based on these instructions;
First I would like to give my thanks to @effg to had take the time to share his experiences on installing LetsEncrypt on his Server. First I tried to install "home brew" on my OS X Mavericks system and I ran into some issues.
- Home Brew only install through my user admin account and not as root.
If you try to install Home brew by issuing the command;
ruby -e "$(curl -fsSL https://raw.githubusercontent.com/Homebrew/install/master/install)"
as root, It will fail. But if you open an new terminal window from your OS X Admin User Account, it will install just fine.
There are some dependencies you should be aware:
a. Install Git First
https://git-scm.com/download/mac
b. Install Xcode Tools
root# xcode-select --install
c. Install Pip
https://pip.readthedocs.org/en/stable/installing/#install-pip
https://pypi.python.org/simple/pip/
d. Install virtualenv
http://exponential.io/blog/2015/02/10/install-virtualenv-and-virtualenvwrapper-on-mac-os-x/
$ sudo pip install virtualenv virtualenvwrapper
Seems like a lot to start but I read a lot information and just followed the links.
Now you are ready to install LetsEncrypt;
Begin with installing Let's Encrypt via Terminal:
You must have "python" installed correct in your system because you will need it to generate and validate your certificates following these instructions. ( Home Brew will do that for you and that is the reason you need to install Home Brew first )
After installation, obtaining your certificates goes as follow:
cd letsencrypt
Now you begin with creating the certificates locally by defining key size and the domains:
./letsencrypt-auto certonly -a manual --rsa-key-size 4096 -d domain.com -d www.domain.com
I found this part a little hard because It gets to a point you have to stop and validate your certificate; (steps)


Stop right here!
Now, you must have access to your domain.com web server root directory to create these folders;
mkdir -p .well-known/acme-challenge
After the creation of these folders you will have to open a root terminal window;
sudo tcsh
....

Here is the problem to many people. To validate the domain you need to create two files inside of the /acme-challenge/ folder.
Log as root;
cd .well-known/acme-challenge/
The name of the file is the first code on the picture; example;
z8HGS1t.. ---> finish with TmQy_M
inside of the file you must have the code that starts with
z8HGS1TBIE2s0Oau-o16... ---> finish with THLKOHHJmHQI
(sorry, I got in a worry and I did not want to write the whole code here, but I am sure you will figure that out)
They are going to ask you to do that twice so you must have two files with the code inside your .well-known/acme-challenge/ directory.
Believe me, pay attention, this is not that easy!
One easy way to create the files is to open the terminal as root and cd to .well-known/acme-challenge/ directory
Then you use the nano editor.
[server root] # well-known/acme-challenge/...( code for title goes here)
inside of the file put the other code here...
then Control o to save, return and Control x to get out of the nano editor.
Ok, I hope you got this in the end;

Ok, Now you have your certificates and they are located on the /etc/letsencrypt/ directory!
- cert.pem
- chain.pem
- fullchain.pem
- privkey.pem
Next, you will have to install and configure your certificates together with your Apache Server.
Here is my "apache2/conf/extra/httpd-ssl-conf" file! Please, do not just copy and paste, verify all the paths to be consistent with your Apache Server Installation.
#
# This is the Apache server configuration file providing SSL support.
# It contains the configuration directives to instruct the server how to
# serve pages over an https connection. For detailed information about these
# directives see <URL:http://httpd.apache.org/docs/2.4/mod/mod_ssl.html>
#
# Do NOT simply read the instructions in here without understanding
# what they do.  They're here only as hints or reminders.  If you are unsure
# consult the online docs. You have been warned.
#
# Required modules: mod_log_config, mod_setenvif, mod_ssl,
#          socache_shmcb_module (for default value of SSLSessionCache)

#
# Pseudo Random Number Generator (PRNG):
# Configure one or more sources to seed the PRNG of the SSL library.
# The seed data should be of good random quality.
# WARNING! On some platforms /dev/random blocks if not enough entropy
# is available. This means you then cannot use the /dev/random device
# because it would lead to very long connection times (as long as
# it requires to make more entropy available). But usually those
# platforms additionally provide a /dev/urandom device which doesn't
# block. So, if available, use this one instead. Read the mod_ssl User
# Manual for more details.
#
#SSLRandomSeed startup file:/dev/random  512
#SSLRandomSeed startup file:/dev/urandom 512
#SSLRandomSeed connect file:/dev/random  512
#SSLRandomSeed connect file:/dev/urandom 512


#
# When we also provide SSL we have to listen to the
# standard HTTP port (see above) and to the HTTPS port
#
Listen *:443

# Go ahead and accept connections for these vhosts
# from non-SNI clients
SSLStrictSNIVHostCheck off
##
##  SSL Global Context
##
##  All SSL configuration in this context applies both to
##  the main server and all SSL-enabled virtual hosts.
##

#   SSL Cipher Suite:
#   List the ciphers that the client is permitted to negotiate.
#   See the mod_ssl documentation for a complete list.
SSLCipherSuite HIGH:MEDIUM:!aNULL:!MD5:ADH

#   Speed-optimized SSL Cipher configuration:
#   If speed is your main concern (on busy HTTPS servers e.g.),
#   you might want to force clients to specific, performance
#   optimized ciphers. In this case, prepend those ciphers
#   to the SSLCipherSuite list, and enable SSLHonorCipherOrder.
#   Caveat: by giving precedence to RC4-SHA and AES128-SHA
#   (as in the example below), most connections will no longer
#   have perfect forward secrecy - if the server's key is
#   compromised, captures of past or future traffic must be
#   considered compromised, too.
#   SSLCipherSuite RC4-SHA:AES128-SHA:HIGH:MEDIUM:!aNULL:!MD5
#   enable only secure protocols:
#   SSLProtocol All -SSLv2 -SSLv3 -TLSv1
#
SSLProtocol All -SSLv2 -SSLv3 -TLSv1
SSLHonorCipherOrder on
SSLCipherSuite  ECDHE-RSA-AES128-GCM-SHA256:ECDHE-ECDSA-AES128-GCM-SHA256:ECDHE-RSA-AES256-GCM-SHA384:ECDHE-ECDSA-AES256-GCM-SHA384:DHE-RSA-AES128-GCM-SHA256:DHE-DSS-AES128-GCM-SHA256:kEDH+AESGCM:ECDHE-RSA-AES128-SHA256:ECDHE-ECDSA-AES128-SHA256:ECDHE-RSA-AES128-SHA:ECDHE-ECDSA-AES128-SHA:ECDHE-RSA-AES256-SHA384:ECDHE-ECDSA-AES256-SHA384:ECDHE-RSA-AES256-SHA:ECDHE-ECDSA-AES256-SHA:DHE-RSA-AES128-SHA256:DHE-RSA-AES128-SHA:DHE-DSS-AES128-SHA256:DHE-RSA-AES256-SHA256:DHE-DSS-AES256-SHA:DHE-RSA-AES256-SHA:ECDHE-RSA-DES-CBC3-SHA:ECDHE-ECDSA-DES-CBC3-SHA:AES128-GCM-SHA256:AES256-GCM-SHA384:AES128-SHA256:AES256-SHA256:AES128-SHA:AES256-SHA:AES:CAMELLIA:DES-CBC3-SHA:!aNULL:!eNULL:!EXPORT:!DES:!RC4:!MD5:!PSK:!aECDH:!EDH-DSS-DES-CBC3-SHA:!EDH-RSA-DES-CBC3-SHA:!KRB5-DES-CBC3-SHA
#   Pass Phrase Dialog:
#   Configure the pass phrase gathering process.
#   The filtering dialog program (`builtin' is an internal
#   terminal dialog) has to provide the pass phrase on stdout.
SSLPassPhraseDialog  builtin

#   Inter-Process Session Cache:
#   Configure the SSL Session Cache: First the mechanism
#   to use and second the expiring timeout (in seconds).
#SSLSessionCache         "dbm:/yourpath/apache2/logs/ssl_scache"
SSLSessionCache        "shmcb:/yourpath/apache2/logs/ssl_scache(512000)"
SSLSessionCacheTimeout  300

#   OCSP Stapling (requires OpenSSL 0.9.8h or later)
#
#   This feature is disabled by default and requires at least
#   the two directives SSLUseStapling and SSLStaplingCache.
#   Refer to the documentation on OCSP Stapling in the SSL/TLS
#   How-To for more information.
#
#   Enable stapling for all SSL-enabled servers:
#SSLUseStapling On

#   Define a relatively small cache for OCSP Stapling using
#   the same mechanism that is used for the SSL session cache
#   above.  If stapling is used with more than a few certificates,
#   the size may need to be increased.  (AH01929 will be logged.)
#SSLStaplingCache "shmcb:/your path/apache2/logs/ssl_stapling(32768)"

#   Seconds before valid OCSP responses are expired from the cache
#SSLStaplingStandardCacheTimeout 3600

#   Seconds before invalid OCSP responses are expired from the cache
#SSLStaplingErrorCacheTimeout 600

##
## SSL Virtual Host Context
##

<VirtualHost _default_:443>

#   General setup for the virtual host
DocumentRoot /Users/domainUser/Sites
ServerName www.domain.com:443
ServerAdmin webmaster@domain.com
ErrorLog "/your path to apache/apache2/logs/error_log"
TransferLog "/your path to apache/apache2/logs/access_log"

#   SSL Engine Switch:
#   Enable/Disable SSL for this virtual host.
SSLEngine on

#   Server Certificate:
#   Point SSLCertificateFile at a PEM encoded certificate.  If
#   the certificate is encrypted, then you will be prompted for a
#   pass phrase.  Note that a kill -HUP will prompt again.  Keep
#   in mind that if you have both an RSA and a DSA certificate you
#   can configure both in parallel (to also allow the use of DSA
#   ciphers, etc.)
#   Some ECC cipher suites (http://www.ietf.org/rfc/rfc4492.txt)
#   require an ECC certificate which can also be configured in
#   parallel.
SSLCertificateFile "/etc/letsencrypt/live/domain.com/cert.pem"

#   Server Private Key:
#   If the key is not combined with the certificate, use this
#   directive to point at the key file.  Keep in mind that if
#   you've both a RSA and a DSA private key you can configure
#   both in parallel (to also allow the use of DSA ciphers, etc.)
#   ECC keys, when in use, can also be configured in parallel
SSLCertificateKeyFile "/etc/letsencrypt/live/domain.com/privkey.pem"

#   Server Certificate Chain:
#   Point SSLCertificateChainFile at a file containing the
#   concatenation of PEM encoded CA certificates which form the
#   certificate chain for the server certificate. Alternatively
#   the referenced file can be the same as SSLCertificateFile
#   when the CA certificates are directly appended to the server
#   certificate for convenience.
SSLCertificateChainFile "/etc/letsencrypt/live/domain.com/fullchain.pem"

#   Certificate Authority (CA):
#   Set the CA certificate verification path where to find CA
#   certificates for client authentication or alternatively one
#   huge file containing all of them (file must be PEM encoded)
#   Note: Inside SSLCACertificatePath you need hash symlinks
#         to point to the certificate files. Use the provided
#         Makefile to update the hash symlinks after changes.
#SSLCACertificatePath "your path to CA"


#   Certificate Revocation Lists (CRL):
#   Set the CA revocation path where to find CA CRLs for client
#   authentication or alternatively one huge file containing all
#   of them (file must be PEM encoded).
#   The CRL checking mode needs to be configured explicitly
#   through SSLCARevocationCheck (defaults to "none" otherwise).
#   Note: Inside SSLCARevocationPath you need hash symlinks
#         to point to the certificate files. Use the provided
#         Makefile to update the hash symlinks after changes.
#SSLCARevocationPath "/your path/apache2/conf/ssl.crl"


#   Client Authentication (Type):
#   Client certificate verification type and depth.  Types are
#   none, optional, require and optional_no_ca.  Depth is a
#   number which specifies how deeply to verify the certificate
#   issuer chain before deciding the certificate is not valid.
#SSLVerifyClient require
#SSLVerifyDepth  10

#   TLS-SRP mutual authentication:
#   Enable TLS-SRP and set the path to the OpenSSL SRP verifier
#   file (containing login information for SRP user accounts).
#   Requires OpenSSL 1.0.1 or newer. See the mod_ssl FAQ for
#   detailed instructions on creating this file. Example:
#   "openssl srp -srpvfile /apache2/conf/passwd.srpv -add username"
#SSLSRPVerifierFile "/apache2/conf/passwd.srpv"

#   Access Control:
#   With SSLRequire you can do per-directory access control based
#   on arbitrary complex boolean expressions containing server
#   variable checks and other lookup directives.  The syntax is a
#   mixture between C and Perl.  See the mod_ssl documentation
#   for more details.
#<Location />
#SSLRequire (    %{SSL_CIPHER} !~ m/^(EXP|NULL)/ \
#            and %{SSL_CLIENT_S_DN_O} eq "Snake Oil, Ltd." \
#            and %{SSL_CLIENT_S_DN_OU} in {"Staff", "CA", "Dev"} \
#            and %{TIME_WDAY} >= 1 and %{TIME_WDAY} <= 5 \
#            and %{TIME_HOUR} >= 8 and %{TIME_HOUR} <= 20       ) \
#           or %{REMOTE_ADDR} =~ m/^192\.76\.162\.[0-9]+$/
#</Location>

#   SSL Engine Options:
#   Set various options for the SSL engine.
#   o FakeBasicAuth:
#     Translate the client X.509 into a Basic Authorisation.  This means that
#     the standard Auth/DBMAuth methods can be used for access control.  The
#     user name is the `one line' version of the client's X.509 certificate.
#     Note that no password is obtained from the user. Every entry in the user
#     file needs this password: `xxj31ZMTZzkVA'.
#   o ExportCertData:
#     This exports two additional environment variables: SSL_CLIENT_CERT and
#     SSL_SERVER_CERT. These contain the PEM-encoded certificates of the
#     server (always existing) and the client (only existing when client
#     authentication is used). This can be used to import the certificates
#     into CGI scripts.
#   o StdEnvVars:
#     This exports the standard SSL/TLS related `SSL_*' environment variables.
#     Per default this exportation is switched off for performance reasons,
#     because the extraction step is an expensive operation and is usually
#     useless for serving static content. So one usually enables the
#     exportation for CGI and SSI requests only.
#   o StrictRequire:
#     This denies access when "SSLRequireSSL" or "SSLRequire" applied even
#     under a "Satisfy any" situation, i.e. when it applies access is denied
#     and no other module can change it.
#   o OptRenegotiate:
#     This enables optimized SSL connection renegotiation handling when SSL
#     directives are used in per-directory context.
#SSLOptions +FakeBasicAuth +ExportCertData +StrictRequire
<FilesMatch "\.(cgi|shtml|phtml|php)$">
    SSLOptions +StdEnvVars
</FilesMatch>
<Directory "your path/apache2/cgi-bin">
    SSLOptions +StdEnvVars
</Directory>

#   SSL Protocol Adjustments:
#   The safe and default but still SSL/TLS standard compliant shutdown
#   approach is that mod_ssl sends the close notify alert but doesn't wait for
#   the close notify alert from client. When you need a different shutdown
#   approach you can use one of the following variables:
#   o ssl-unclean-shutdown:
#     This forces an unclean shutdown when the connection is closed, i.e. no
#     SSL close notify alert is sent or allowed to be received.  This violates
#     the SSL/TLS standard but is needed for some brain-dead browsers. Use
#     this when you receive I/O errors because of the standard approach where
#     mod_ssl sends the close notify alert.
#   o ssl-accurate-shutdown:
#     This forces an accurate shutdown when the connection is closed, i.e. a
#     SSL close notify alert is send and mod_ssl waits for the close notify
#     alert of the client. This is 100% SSL/TLS standard compliant, but in
#     practice often causes hanging connections with brain-dead browsers. Use
#     this only for browsers where you know that their SSL implementation
#     works correctly.
#   Notice: Most problems of broken clients are also related to the HTTP
#   keep-alive facility, so you usually additionally want to disable
#   keep-alive for those clients, too. Use variable "nokeepalive" for this.
#   Similarly, one has to force some clients to use HTTP/1.0 to workaround
#   their broken HTTP/1.1 implementation. Use variables "downgrade-1.0" and
#   "force-response-1.0" for this.
BrowserMatch "MSIE [2-5]" \
         nokeepalive ssl-unclean-shutdown \
         downgrade-1.0 force-response-1.0

#   Per-Server Logging:
#   The home of a custom SSL log file. Use this when you want a
#   compact non-error SSL logfile on a virtual host basis.
CustomLog "/private/var/log/apache2/log/ssl_request_log" \
          "%t %h %{SSL_PROTOCOL}x %{SSL_CIPHER}x \"%r\" %b"
#
CustomLog "/private/var/log/apache2/ssl_request_log" \
          "%t %h %{SSL_PROTOCOL}x %{SSL_CIPHER}x \"%r\" %b"
</VirtualHost>
Here is my "apache2/conf/extra/httpd-vhosts.conf" file! Please, do not just copy and paste, verify all the paths to be consistent with your Apache Server Installation.
# Virtual Hosts
#
# Required modules: mod_log_config

# If you want to maintain multiple domains/hostnames on your
# machine you can setup VirtualHost containers for them. Most configurations
# use only name-based virtual hosts so the server doesn't need to worry about
# IP addresses. This is indicated by the asterisks in the directives below.
#
# Please see the documentation at
# <URL:http://httpd.apache.org/docs/2.4/vhosts/>
# for further details before you try to setup virtual hosts.
#
# You may use the command line option '-S' to verify your virtual host
# configuration.


# domain.com site
<VirtualHost *:80>
RewriteEngine On
RewriteCond %{HTTPS} !=on
RewriteRule ^/(.*) https://%{SERVER_NAME}/$1 [R,L]
ServerAdmin webmaster@domain.com
DocumentRoot "/Users/domainUser/Sites"
ServerName domain.com
ServerAlias www.domain.com
</VirtualHost>

# ipv6 domain.com site
<VirtualHost [2Xxx:xxx:cexx:6xxx::x:xx]:80>
RewriteEngine On
RewriteCond %{HTTPS} !=on
RewriteRule ^/(.*) https://%{SERVER_NAME}/$1 [R,L]
ServerAdmin webmaster@domain.com
DocumentRoot "/Users/domainUser/Sites"
ServerName domain.com
ServerAlias www.domain.com
</VirtualHost>


# testing domain.com host 443

# domain.com site virtual host SSL 443
<VirtualHost *:443>
ServerAdmin webmaster@domain.com
ServerName domain.com
ServerAlias www.domain.com
DocumentRoot "/Users/domainUser/Sites"
SSLProtocol All -SSLv2 -SSLv3 -TLSv1
SSLHonorCipherOrder on
SSLCipherSuite  ECDHE-RSA-AES128-GCM-SHA256:ECDHE-ECDSA-AES128-GCM-SHA256:ECDHE-RSA-AES256-GCM-SHA384:ECDHE-ECDSA-AES256-GCM-SHA384:DHE-RSA-AES128-GCM-SHA256:DHE-DSS-AES128-GCM-SHA256:kEDH+AESGCM:ECDHE-RSA-AES128-SHA256:ECDHE-ECDSA-AES128-SHA256:ECDHE-RSA-AES128-SHA:ECDHE-ECDSA-AES128-SHA:ECDHE-RSA-AES256-SHA384:ECDHE-ECDSA-AES256-SHA384:ECDHE-RSA-AES256-SHA:ECDHE-ECDSA-AES256-SHA:DHE-RSA-AES128-SHA256:DHE-RSA-AES128-SHA:DHE-DSS-AES128-SHA256:DHE-RSA-AES256-SHA256:DHE-DSS-AES256-SHA:DHE-RSA-AES256-SHA:ECDHE-RSA-DES-CBC3-SHA:ECDHE-ECDSA-DES-CBC3-SHA:AES128-GCM-SHA256:AES256-GCM-SHA384:AES128-SHA256:AES256-SHA256:AES128-SHA:AES256-SHA:AES:CAMELLIA:DES-CBC3-SHA:!aNULL:!eNULL:!EXPORT:!DES:!RC4:!MD5:!PSK:!aECDH:!EDH-DSS-DES-CBC3-SHA:!EDH-RSA-DES-CBC3-SHA:!KRB5-DES-CBC3-SHA
SSLEngine on
SSLCertificateFile "/etc/letsencrypt/live/domain.com/cert.pem"
SSLCertificateKeyFile "/etc/letsencrypt/live/domain.com/privkey.pem"
SSLCertificateChainFile "/etc/letsencrypt/live/domain.com/fullchain.pem"
    ErrorLog "yourpath/apache2/logs/error_log"
    TransferLog "yourpath/apache2/logs/access_log"
    CustomLog yourpath/apache2/logs/ssl_request_log \
          "%t %h %{SSL_PROTOCOL}x %{SSL_CIPHER}x \"%r\" %b"
</VirtualHost>
There is a little issue I want to comment here. If you look these two configuration files you will note that there are two links pointing to the domain.com and other to www.domain.com. In reality it should be just one path to "domain.com" that will include both the domain.com and the subdomain www.domain.com. What happened, is that when I was running the code to create the certificates, I forgot to include the prefix for the sub-domain www. But you do not need to make this mistake. In my case, I will try again to re-create the certificates with both prefixes.
Ok! As I mentioned before, I found an easy way to create the certificates by running this code as root;
I was doing a research on LetsEncrypt and I found this site where the author explain how he got his certificate.
Obtaining a certificate
https://www.metachris.com
I changed the code to reflect my needs;
To obtain a certificate without stopping a running webserver, we are going to use the webroot method, which only requires write access for the webroot to save the authentication file. (logged as root)
cd letsencrypt
With 4096 Key size
sudo ./letsencrypt-auto certonly \
--webroot --webroot-path /Users/user/Sites/ \
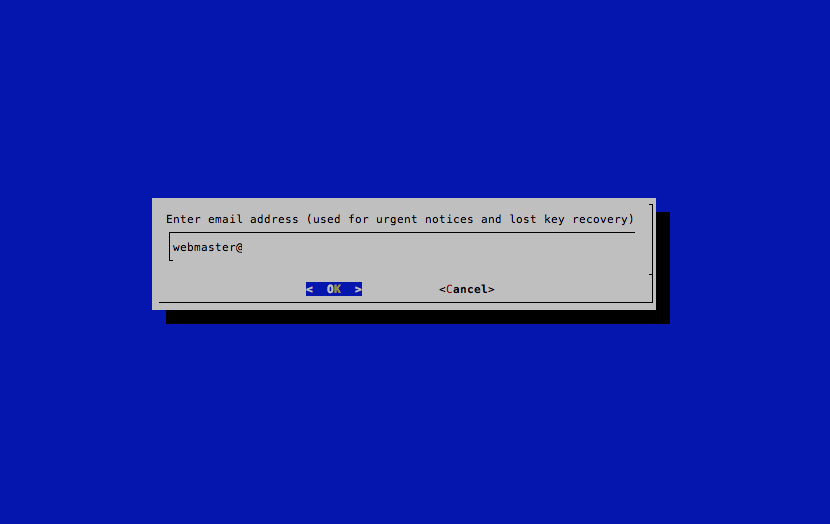
--email webmaster@domain.com \
--rsa-key-size 4096 -d domain.org -d www.domain.org
When is time to Renewal
To renew certificates automatically, simply add the --renew parameter to the above command: (logged as root)
cd letsencrypt
sudo ./letsencrypt-auto certonly \
    --renew \
    --webroot --webroot-path /Users/user/Sites/ \
    --email webmaster@domain.com \
    --rsa-key-size 4096 -d domain.org -d www.domain.org
Anyway, you will have to test yourself just the way I did! Like I said, I forgot to put in the code "-d www.domain". I will try to run the code again with the sub-domain www.
I know this is a little behold the scope of this post but I am sure many of you, after had installed and configured your certificate, you site still show this on the address field instead of the green lock.
![]()
That is easy to resolve but you will have to go through all your web pages the remove the "http:" just like this;
You have this:
Change to this;
and the green lock will appear just fine.
Ps: Tonight, I tested the server again by deleting all my certificates from /etc/letsencrypt and ran the code again, this time with both -d domain.com and -d www.domain.com and everything was a success. Now the https requests respond both on domain.com and www.domain.com. I am a happy face now! ![]()
There one last thing I would like to comment here;
If you look at your "/etc/letsencrypt", you will find in the end a directory called "renewal". Inside of the "renewal" directory you will find a file with the name, "domain.com.conf". Open that file with your editor and check all the paths to your apache server. In my case I do not use the /etc/apache2/ directory from the OS X original installer because the same (on Mavericks) become obsolete. I upgrade Apache 2 but in my case is pointing to a different directory. So I opened the "domain.com.conf" file with "root nano editor" and edited appropriately to reflect my configuration path. Now if you are on Yosemite or El Captain, you do not need to worry about that because your Apache Server directory is already pointing to "/etc/apache2".